Quick Sourdough Sandwich Bread (No Added Yeast)
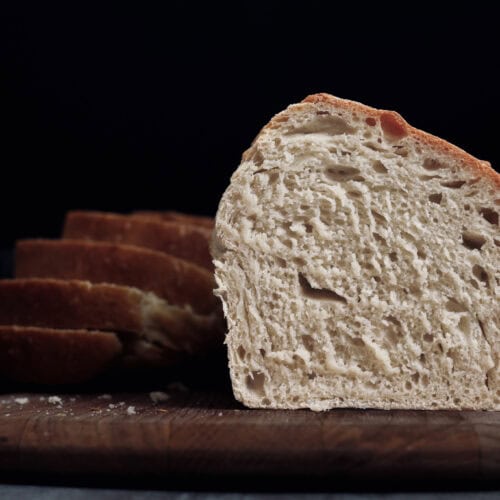
Need some fresh sourdough sandwich bread but short on time? This quick sourdough sandwich bread is your answer! It’s a same-day bake, ready in less than 5 hours from start to finish. Perfect for an afternoon baking session, this bread is soft, fluffy, and has a thin crust — ideal for sandwiches.

This post contains affiliate links. If you use the links to make a purchase, I will make a small commission at no extra cost to you.
Why you will love this quick sourdough sandwich bread recipe:
- Super Quick: From mixing to baking, it’s done in under 5 hours. No cold retard or long bulk fermentation. Perfect for bakers who are short on time or avoid baking sourdough bread because of the long process involved. No more planning ahead for a delicious sourdough loaf.
- Same-Day Bake: No need to wait overnight, perfect for spontaneous sourdough bakers.
- Kid-friendly: If your kids complain about thick and hard crust on your sourdough bread, it’s time to try this super soft sourdough loaf with a thin crust.
- Soft And Fluffy Texture: Great for sandwiches for the whole family. Enjoy fresh or toasted.

Ingredients needed:
- Bread Flour: you can use all-purpose flour but the fermentation time will be longer.
- Sourdough Starter: active and bubbly (recently fed or at peak).
- Filtered Water: warm water (not hot) is ideal for fast fermentation.
- Olive Oil: but any oil would work.
- Sugar: I used unrefined granulated sugar. Honey works as well.
- Salt: I used Celtic Salt.

Step-by-step instructions:
Mix the Dough: In a large bowl, combine the bread flour, salt, and unrefined sugar. Add the sourdough starter. Gradually add the warm water and olive oil, mixing until a sticky dough forms and all the flour is well incorporated. You can also use a stand mixer with a dough hook attachment. Cover with a damp kitchen towel.
Rest: Let the dough rest for 30 minutes.
Stretch-and-folds: Perform 2 sets of 4 stretches and folds with your wet hands. The dough should look smooth and elastic. If the dough breaks easily after and is very sticky still, let it rest for another 30 minutes and perform another set of 4 stretch and folds. Cover with a damp towel and let it ferment at room temperature.
Bulk Ferment: Fermentation times can vary from one kitchen to another. For me it took 4 hours (bulk fermentation starts when you first mix the dough, not after first stretch and folds) to double in size (in the summer it would take less for me). Please be aware that it can take less or longer for you.
Your dough is ready when it has almost doubled in size, it has a domed appearance, is jiggly, light and airy (lots of small bubbles on the bottom and larger bubbles on top).

Shape the dough: Flour your work surface and put the dough on. Flour your hands and gently stretch the dough into a rectangle by grabbing the sides from underneath.

Proceed by folding the dough onto itself from all sides. Make sure you gently press to seal the sides. Once you have a square shape fold one more time in half and gently pinch the sides in the middle and do some stitching with your fingers to properly seal the dough.


Prepare your loaf pan with parchment paper. Use a bench scraper to pick up the shaped loaf and turn it side up in the loaf pan.

Wet your hands and gently run them on the surface of the dough without pressing. This helps smoothen the crust of the loaf.
Proof: Let the dough proof in the loaf pan for about 30 minutes. Meanwhile preheat your oven to 480°F (250°C). Mine takes 30 minutes to preheat. The dough is ready to bake if when you gently push one finger into the dough it springs back slowly and not fully. The dough needs more time to proof if the dough springs back quickly and fully. If the dough does not spring back at all your dough is over proofed and likely collapsed. Bake it anyway and try again another time as “practice makes perfect”. The bread will still be edible you can use it for making croutons, breakfast casserole, or bread pudding muffins).
Bake: Put the bread in the oven and add a cup of hot water in an oven safe dish to create steam (this will help with oven spring). Close the door immediately and do not open until you need to check if the bread is done. Bake the sourdough sandwich loaf for 30-35 minutes at 480°F (250°C) or until golden brown on top.
Cool and Enjoy: Let the bread cool in the pan for 10 minutes before transferring it to a wire rack to cool completely. Slice and enjoy!

Pro baking tips:
- Use Active Starter: I recommend using an active starter rather than discard (unfed starter) to be able to ferment the bread quickly. You can either use it at peak or anytime after, as long as it has been recently fed and is still bubbly. Mine stays bubbly in the fridge for up to 48hrs and still works great (but I do bring it out to room temperature before mixing the dough).
- Use Warm Water: If the water is cold or even room temperature your dough will take longer to ferment. Caution: don’t use hot water as it will kill the yeast and bacteria in your dough.
- Spritz With Water: if you like a shiny crust you can spritz the dough with water right before baking.
- Steam In The Oven: Using steam in the oven creates the right environment for the dough to have a great oven spring and cook evenly. Just a cup of hot water should do the trick. Note: Some people advise to use ice cubes to create steam. I don’t recommend that as it will bring down the oven temperature and might affect the end result.
- Use a baking stone: If you have issues with uncooked bottom of your bread, I recommend using a hot baking stone to put your loaf pan on top when baking. This will help the bread cook evenly and faster. If your oven does the opposite, avoid using the baking stone.
- Don’t slice the bread too soon: Avoid gummy bread by delaying slicing until the bread has cooled off. Note: If the bread is still gummy after waiting, that means your dough was under proofed or your bread was not cooked through properly.

Storage tips:
- If you wish to store the bread on the counter, place the whole loaf in a bread bag or bread box. It should keep fresh for a few days. If it goes stale you can spritz the loaf with some water and heat it in the oven at 356°F (180°C) for a few minutes. It will bring it back to its freshly baked state.
- If you would like to freeze it, slice the whole loaf once it has cooled off and place it in a zip lock bag. Freeze it for up to a month. Take out the amount you need and let it partially thaw at room temperature. Then gently toast the slices in a cast iron pan for the freshest taste and texture.
More sourdough recipes to try:

Quick Sourdough Sandwich Bread (No Added Yeast)
Equipment
- 1 loaf pan 9"x5" (23cm x13cm)
Ingredients
- 4 1/8 cups bread flour approx. 500g
- 1 cup + 1tbsp sourdough starter (recently fed active starter) approx. 250g
- 1 1/4 cups warm water (filtered) approx. 300g
- 3 tbsp olive oil approx. 40g
- 1 tsp granulated sugar approx. 5g
- 2 tsp salt (or 1 3/4 tsp for lower salt) approx. 12g (or lower to 10-11g)
Instructions
- Mix the Dough: In a large bowl, combine the bread flour, salt, and unrefined sugar. Add the sourdough starter. Gradually add the warm water and olive oil, mixing until a sticky dough forms and all the flour is well incorporated. You can also use a stand mixer with a dough hook attachment. Cover with a damp kitchen towel.4 1/8 cups bread flour, 1 cup + 1tbsp sourdough starter (recently fed active starter), 1 1/4 cups warm water (filtered), 3 tbsp olive oil , 1 tsp granulated sugar, 2 tsp salt (or 1 3/4 tsp for lower salt)
- Rest: Let the dough rest for 30 minutes.
- Stretch-and-folds: Perform 2 sets of 4 stretches and folds with your wet hands. The dough should look smooth and elastic. If the dough breaks easily after and is very sticky still, let it rest for another 30 minutes and perform another set of 4 stretch and folds. Cover with a damp towel and let it ferment at room temperature.
- Bulk Ferment: Fermentation times can vary from one kitchen to another. For me it took 4 hours (bulk fermentation starts when you first mix the dough, not after first stretch and folds) to double in size (in the summer it would take less for me). Please be aware that it can take less or longer for you.
- Your dough is ready when it has almost doubled in size, it has a domed appearance, is jiggly, light and airy (lots of small bubbles on the bottom and larger bubbles on top).
- Shape the dough: Flour your work surface and put the dough on. Flour your hands and gently stretch the dough into a rectangle by grabbing the sides from underneath.
- Proceed by folding the dough onto itself from all sides. Make sure you gently press to seal the sides. Once you have a square shape fold one more time in half and gently pinch the sides in the middle and do some stitching with your fingers to properly seal the dough.
- Prepare your loaf pan with parchment paper. Use a bench scraper to pick up the shaped loaf and turn it side up in the loaf pan.
- Wet your hands and gently run them on the surface of the dough without pressing. This helps smoothen the crust of the loaf.
- Proof: Let the dough proof in the loaf pan for about 30 minutes. Meanwhile preheat your oven to 480°F (250°C). Mine takes 30 minutes to preheat. The dough is ready to bake if when you gently push one finger into the dough it springs back slowly and not fully. The dough needs more time to proof if the dough springs back quickly and fully. If the dough does not spring back at all your dough is over proofed and likely collapsed. Bake it anyway and try again another time as "practice makes perfect". The bread will still be edible.
- Bake: Put the bread in the oven and add a cup of hot water in an oven safe dish to create steam (this will help with oven spring). Close the door immediately and do not open until you need to check if the bread is done. Bake the sourdough sandwich loaf for 30-35 minutes at 480°F (250°C) or until golden brown on top.
- Cool and Enjoy: Let the bread cool in the pan for 10 minutes before transferring it to a wire rack to cool completely. Slice and enjoy!